Automated message sequences allow you to deliver tailored, multi-step communication to your clients across email, SMS, and push notifications. By adding custom steps and sequences, you can personalize touchpoints, improve client engagement, and maintain timely communication throughout the customer journey. This article explains how to add sequences, customize message steps, and delete steps.
Things to know:
- The ability to add, edit, and delete automated message steps is controlled by the Accessing Automated Messages access control setting.
- This feature requires a hidden setting to be enabled by the MyTime team. Contact support@mytime.com to request activation.
- Sequence vs. Step:
- Sequence: A group of automated messages triggered by a specific event, such as an appointment confirmation or booking reminder.
- Step: An individual message within a sequence, such as an email, SMS, or push notification, scheduled to send at a specific time.
- Sequence Scope: Each sequence is associated with specific services, service variations, classes, or memberships. Steps added to a sequence automatically inherit its scope, which cannot be changed when editing an individual step. To target different services or variations, create a new sequence.
- Default Sequence: The default sequence applies to all services and all applicable classes or memberships. The default "All Services" sequence cannot be deleted but can be reset to its original state.
- Step Order: Steps are grouped by service or variation and numbered chronologically according to their send timing, rather than their creation order.
- Single-Step Messages: Some automated messages support only one step. For these messages, the + Add Step button is disabled, with a tooltip explaining that only one step is supported.
- Deleting Steps: Steps must be deleted from the step editor to help prevent accidental deletion. Deleting the last remaining step in a custom sequence also removes the sequence after a confirmation prompt.
- Guided Tour: The first time you open the page, a walkthrough introduces sequences and steps.
Contents:
Customizing Automated Messages in a Sequence
Once the feature has been enabled, you can add additional message steps to supported sequences:
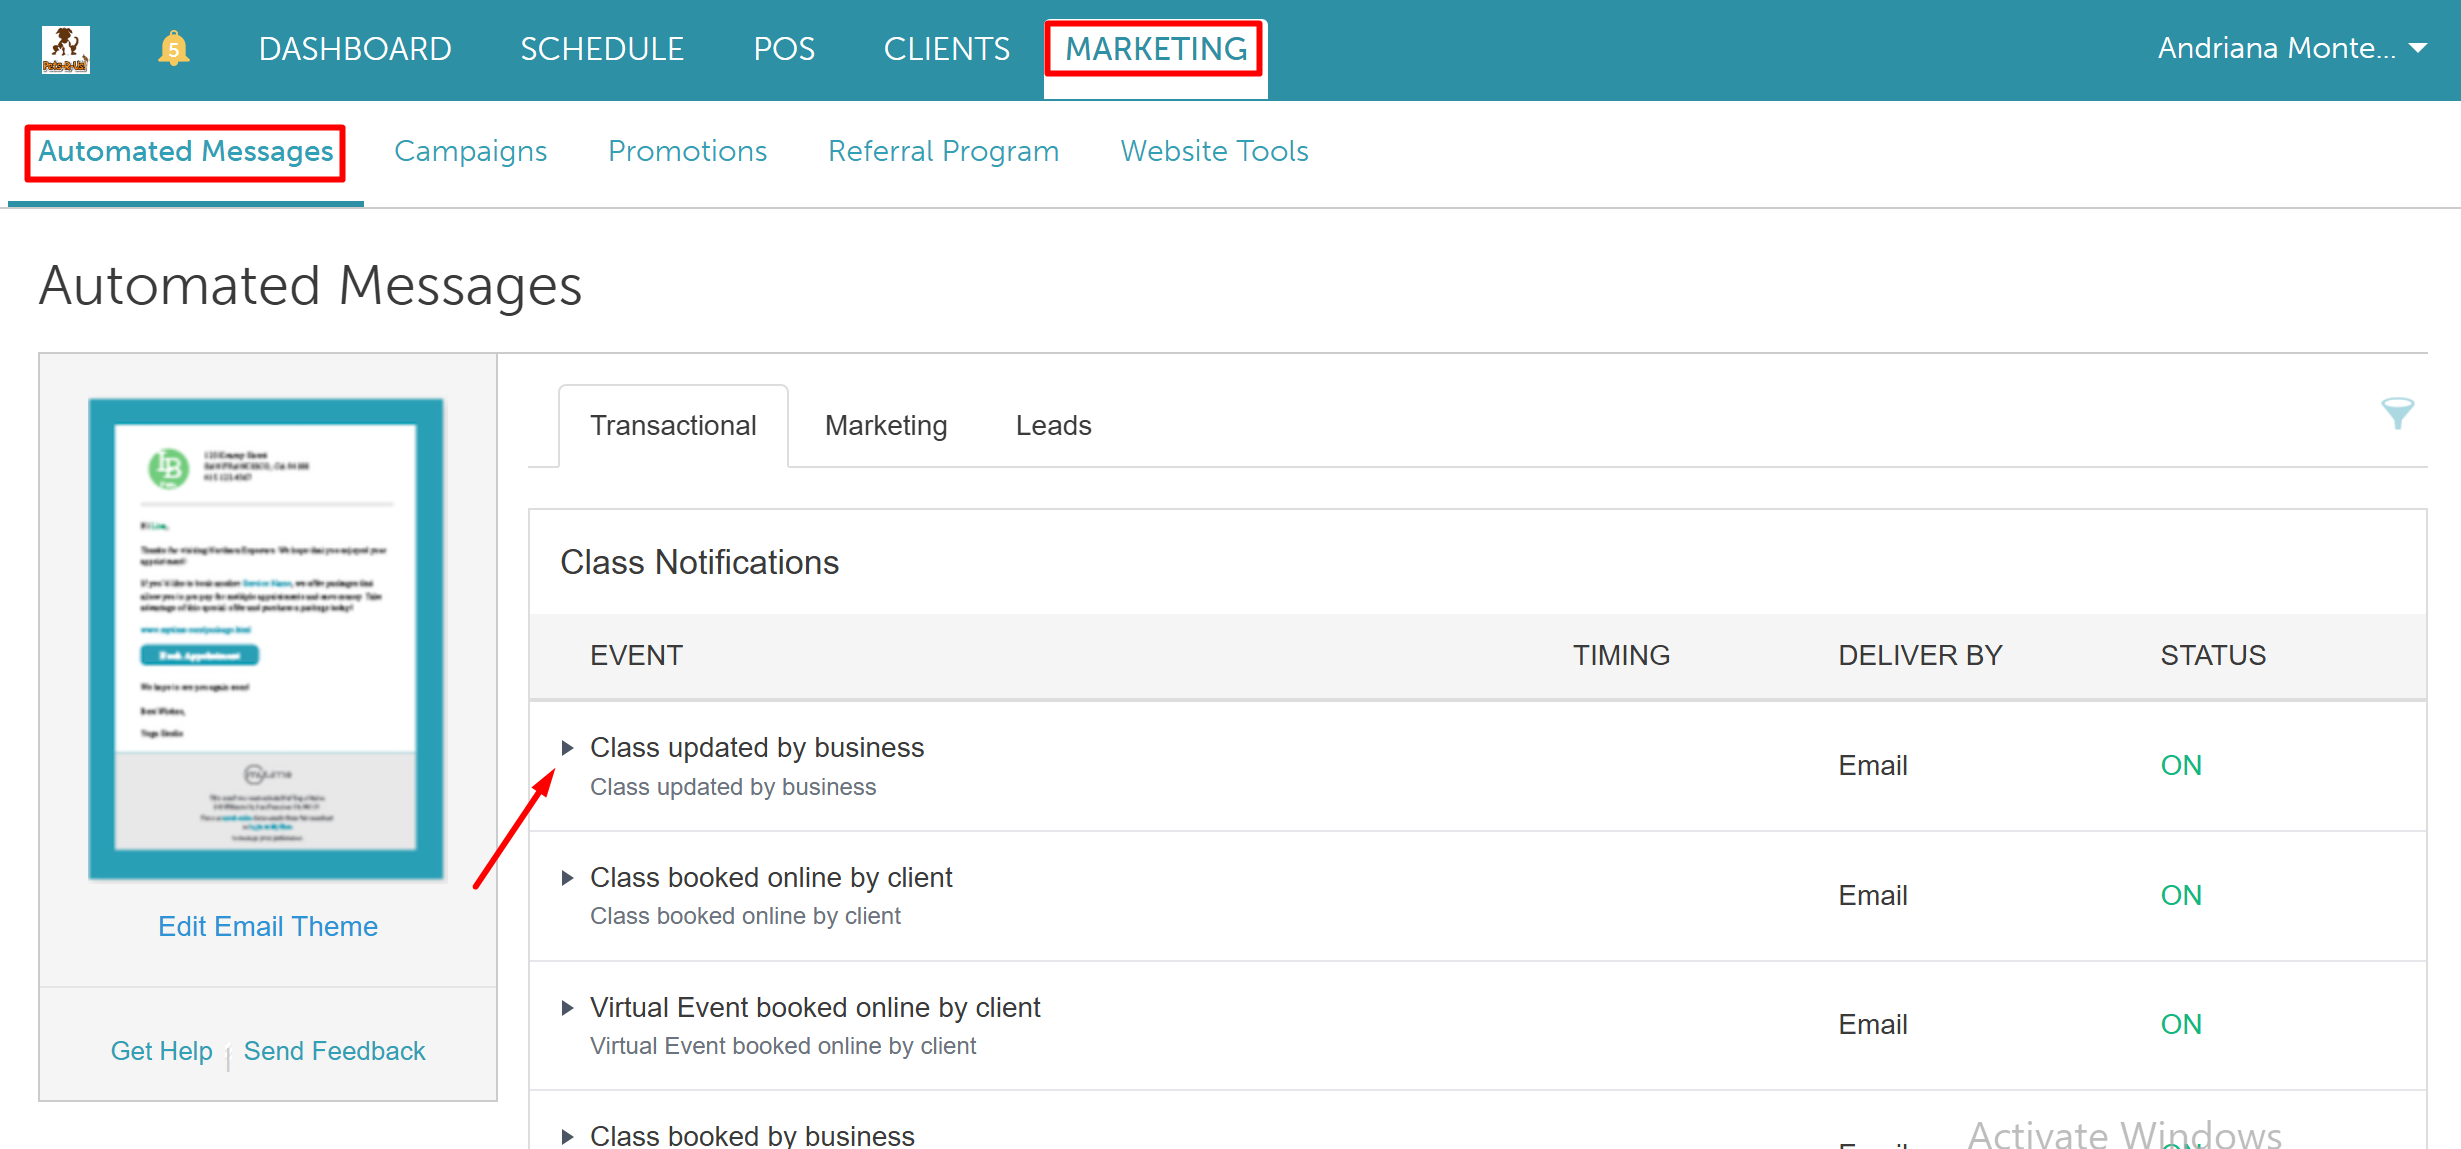
- Go to Marketing > Automated Messages
- Locate the sequence you want to update
- Click the arrow next to the template name to expand the list of notifications
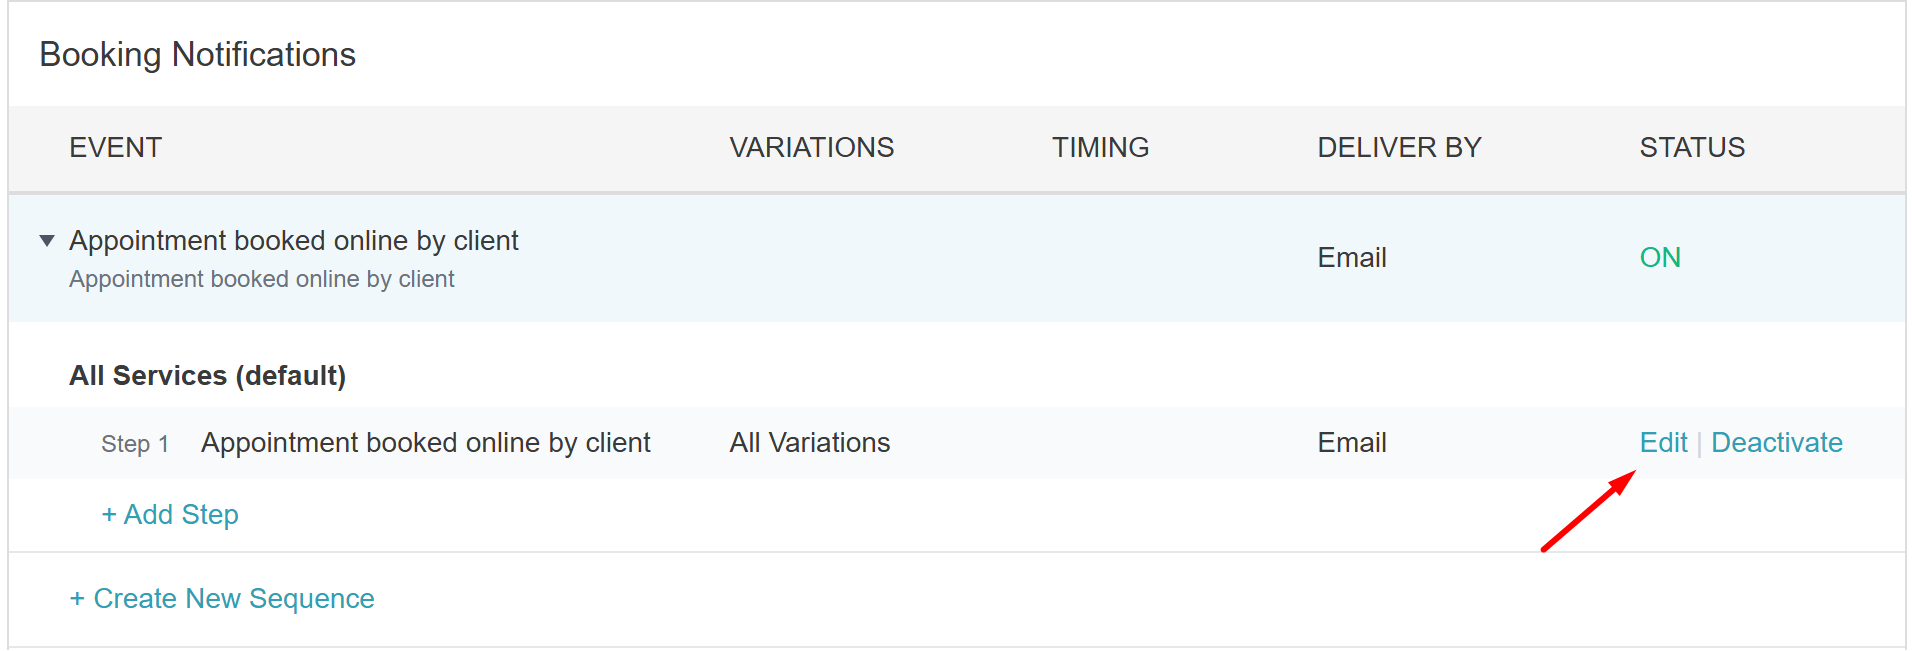
- Hover over the default template, then click 'Edit'
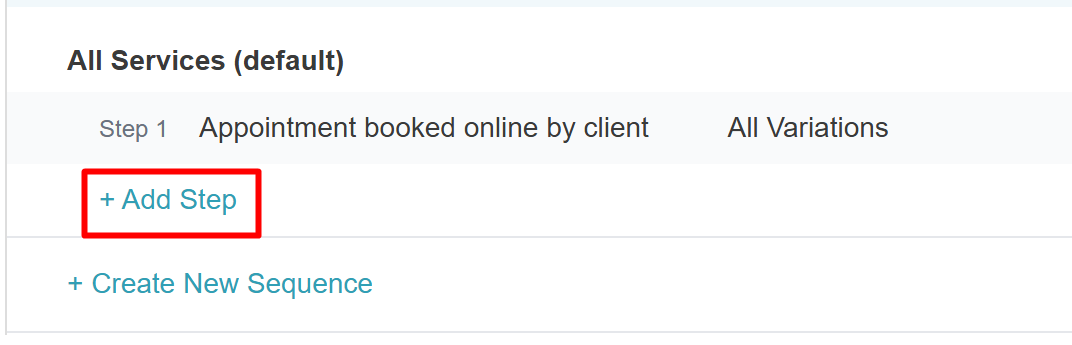
- If you wish to create another template for the section, click '+Add Step'
- Customize the message content, timing, and delivery settings. Learn more here
- Click Save to apply your changes
Adding Another Sequence
You can create new sequences to add to each section:
- Go to Marketing > Automated Messages
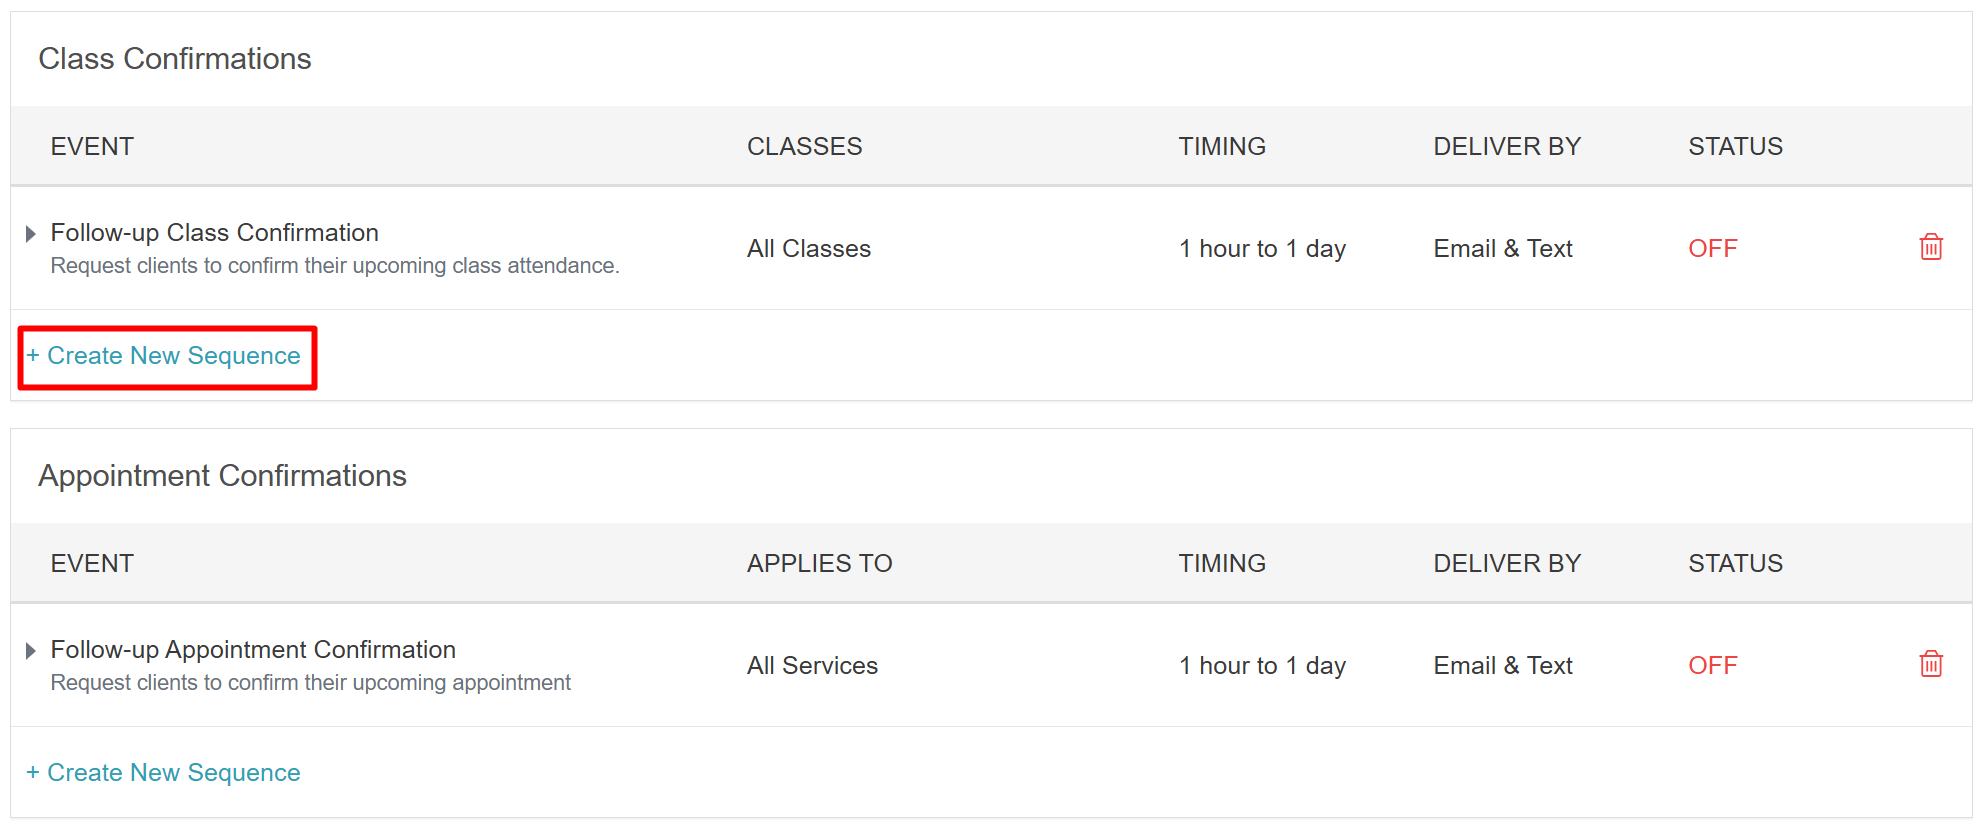
- Locate the section where you want to add a sequence
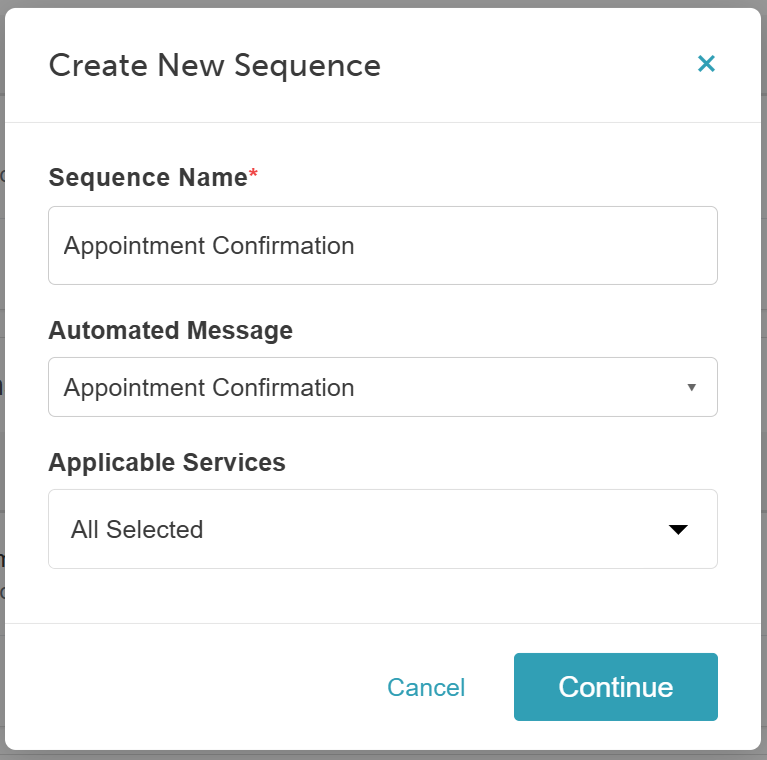
- Click 'Create New Sequence'
- Configure the following:
- Sequence Name: Keep the prefilled name or enter a custom name.
- Automated Message: This is preselected based on the section where you clicked Create New Sequence.
- Applicable Services: Select the service or services the sequence should apply to.
- Click 'Continue'
- Customize the message template to suit your needs. Learn more here
- Click Save to apply your changes
Editing a Step
To modify the content, timing, or settings of an individual step:
- Navigate to Marketing > Automated Messages
- Expand the sequence containing the step you want to modify
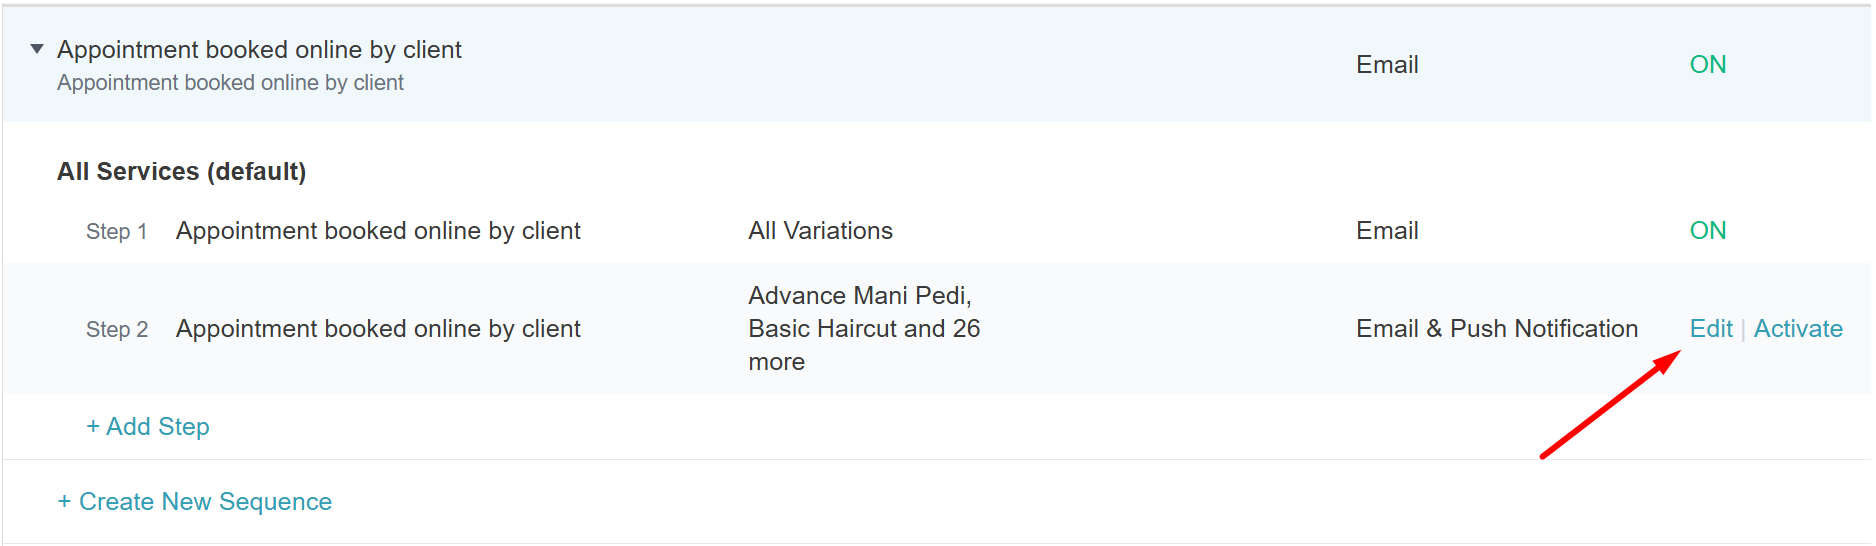
- Hover over the step and click 'Edit'
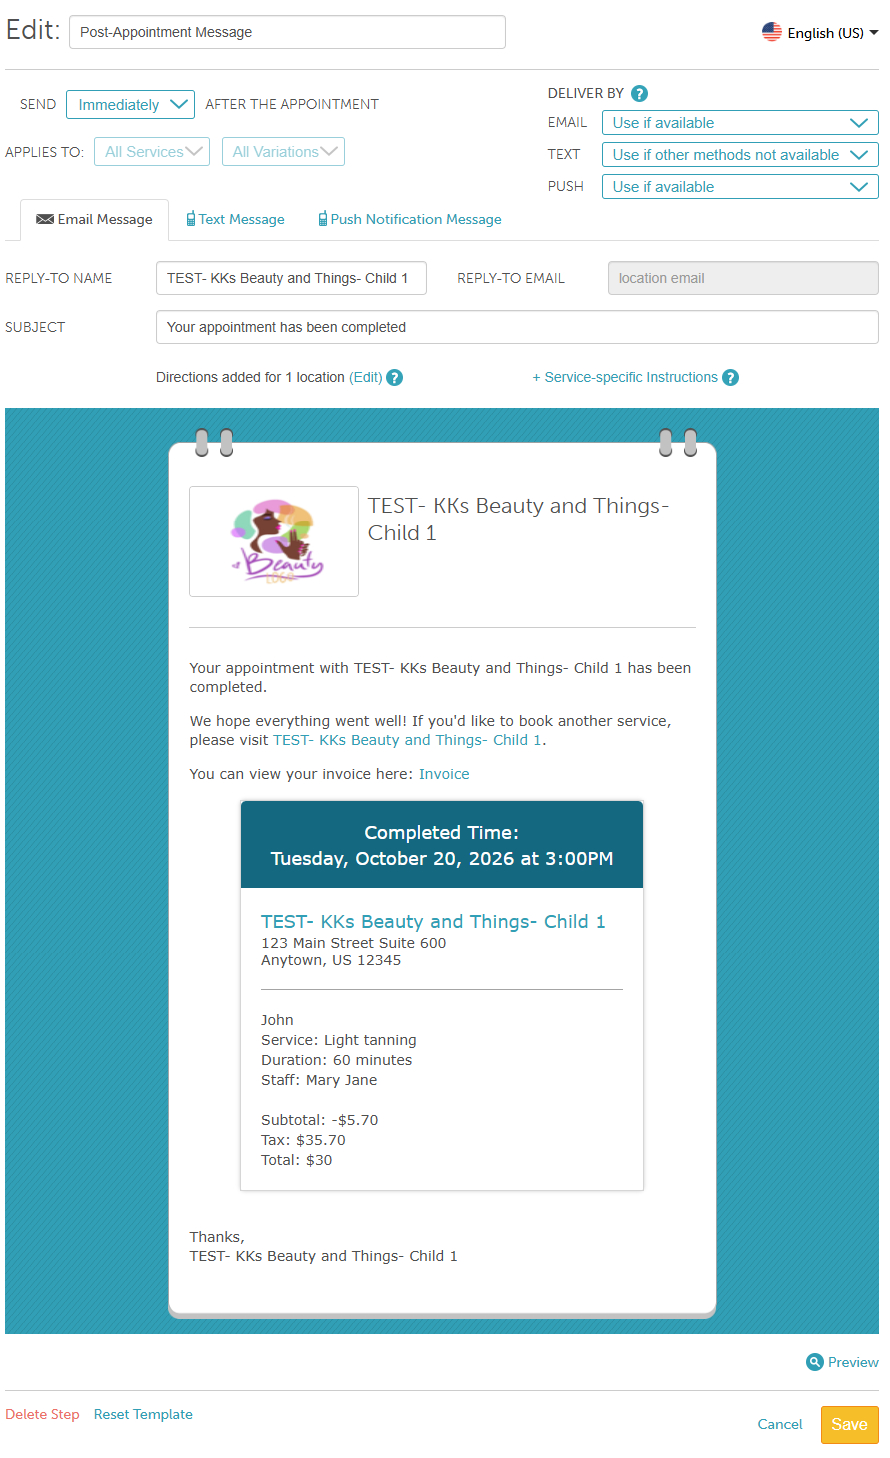
- Update the desired settings, such as:
- Message Content: Subject line, email body, or message template.
- Timing: When the message is sent relative to the sequence's triggering event.
- Delivery Method: Email, SMS, or push notification.
- Click Save to apply your changes
Note: The service and variation settings inherited from the parent sequence cannot be changed within an individual step. To apply messages to different services or variations, create a new sequence.
Deleting a Step
To remove an individual step from a sequence:
- Navigate to Marketing > Automated Messages
- Expand the sequence and select the step you wish to remove to open the step editor
- Hover over the step and click Edit
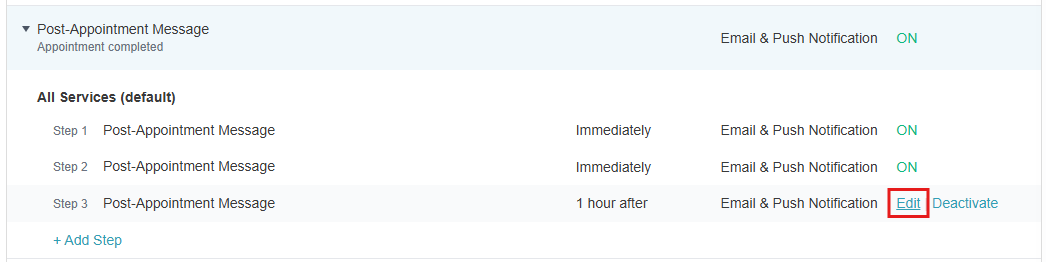
- In the footer of the step editor, click 'Delete Step'
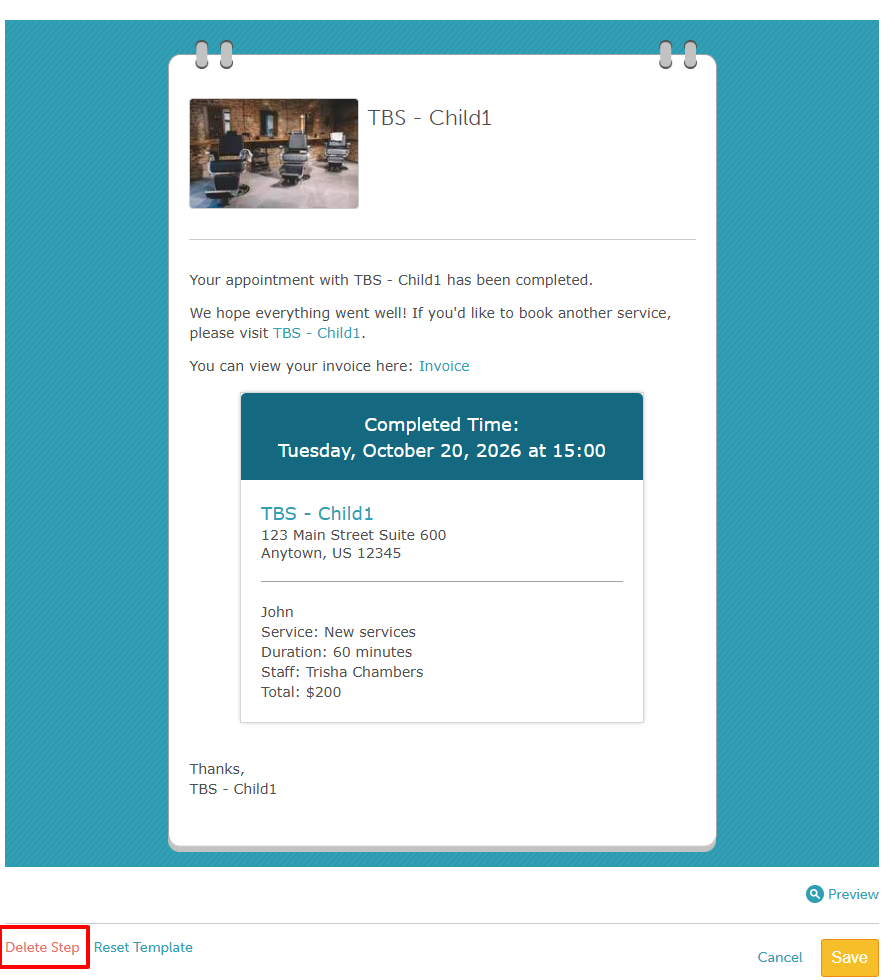
- A confirmation dialog will appear prompting you to confirm
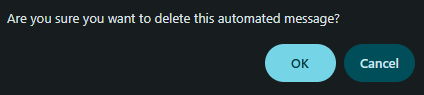
- Click Ok to permanently delete the step.
Note: If the step is the last remaining step in a custom sequence, deleting it also removes the entire sequence. A confirmation message will explain this before deletion is completed.
Related Articles:
Configure Pre-Appointment/Pre-Class Reminder Notifications
Automated Drip Campaign For Rebooking Reminders
Configure Appointment Review Notification
Configure Expiration Reminder Notifications
Was this article helpful?
That’s Great!
Thank you for your feedback
Sorry! We couldn't be helpful
Thank you for your feedback
Feedback sent
We appreciate your effort and will try to fix the article