You can create and collect signatures for membership agreements as part of an in-store membership purchase. Agreements can be presented to clients through the client profile, POS, or directly on Ingenico terminals, making it easy to capture signatures at checkout.
Things to know:
- Learn more about signing agreements via the Ingenico terminal here.
- Membership agreements will only display in POS if a membership intake form has been created and one or more memberships have been selected/assigned to that form.
- If the “Prompt for membership agreement signature when selling memberships in POS” setting is enabled, staff will be prompted to collect a signature during the membership purchase.
- This prompt is optional and can be skipped if needed.
- The prompt appears after a client is added to the ticket along with a membership that has an associated membership agreement.
- Agreement terms and conditions are displayed on the Ingenico terminal only if the “Display Waiver on Terminal Screen Before Requesting Client Signature” setting is enabled under Business Setup > Settings.
CONTENTS
- Generating Membership Agreements via Client Profile
- Enable Prompt for Membership Agreement Signature in POS
- Generating Membership Agreements via POS
Generating Membership Agreements via Client Profile
- Go to the Clients tab and open the desired client profile
- In the Memberships section, click "Add Membership"
- Select the location and the specific membership
- When the Waiver field appears, select the appropriate agreement from the dropdown menu
- Have the client review and sign the membership agreement displayed on the screen
- Click Save to attach the signed waiver to the membership record
- The signed waiver will be attached to the membership
- Click "Take Payment" to proceed to the checkout screen and complete the transaction


Enable Prompt for Membership Agreement Signature in POS
- Navigate to Business Setup > Settings
- Scroll down to the POS section
- Locate the setting labeled "Prompt for membership agreement signature when selling memberships in POS"

- Toggle the setting to Yes
- Click Save at the bottom of the page to apply your changes
Generating Membership Agreements via POS
When selling a membership through the Point of Sale (POS), staff can collect client signatures immediately on-screen, route them to a payment terminal, or send them remotely
Method 1: Agreement Prompt Enabled (Automatic)
If the signature prompt setting is active, the agreement workflow initiates as soon as you add a membership to a ticket.
- Navigate to POS > New Ticket
- Add a client, then add the membership to the ticket
- On the Send Agreement prompt that appears, select the appropriate waiver from the dropdown (preselected if only one is available).
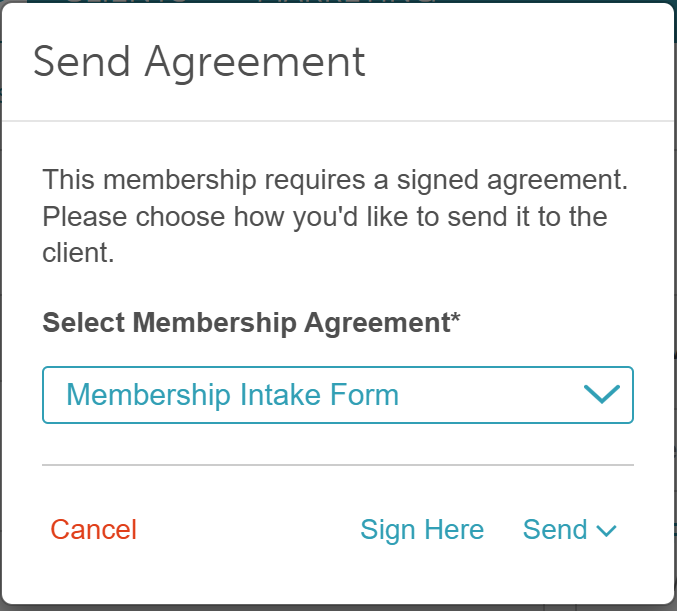
- Select your preferred signing method:
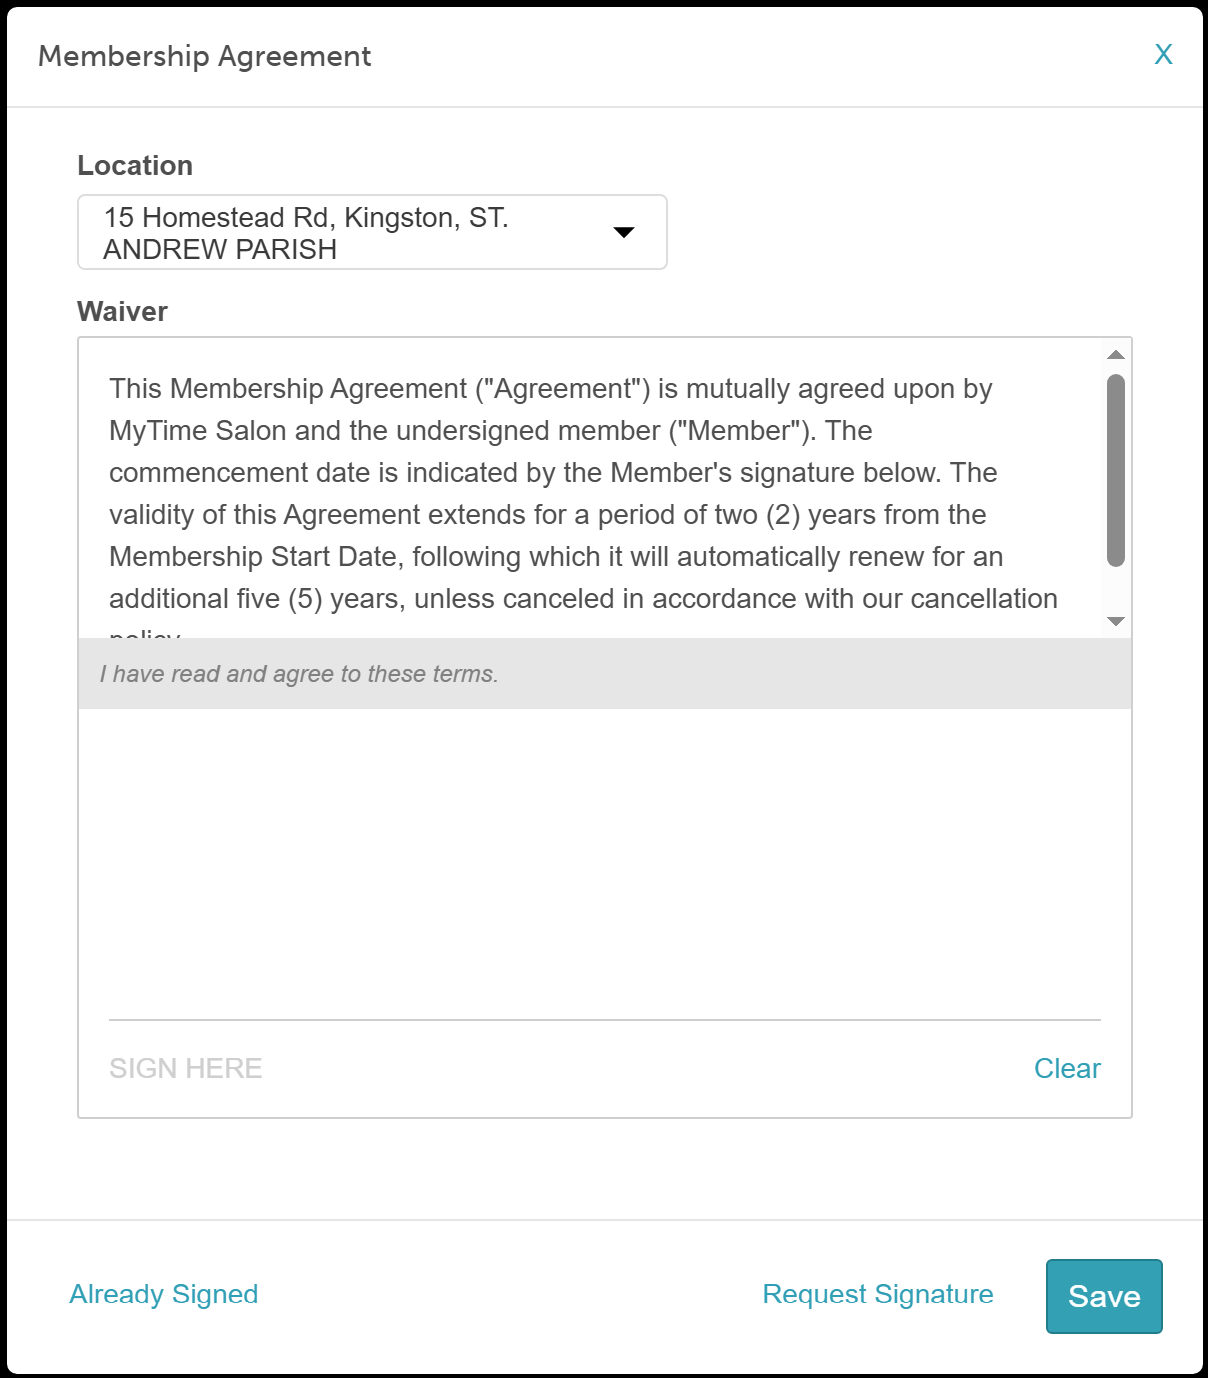
- Sign Here: Opens the document on your current device for the client to sign using a mouse, touchscreen, or tablet.
- Payment Terminal: Displays the agreement on your terminal screen (available for Global Payments accounts using an Ingenico terminal). Learn more about signing agreements via the Ingenico terminal here.
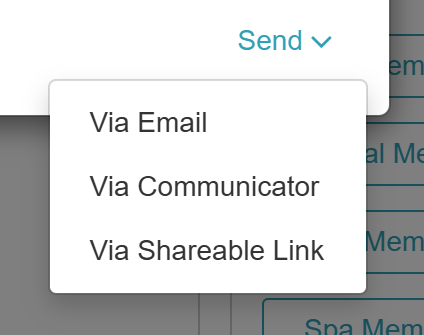
- Send Remotely: Delivers a digital signature link via Email (opens a campaign template), Communicator (sends an in-app message), or Shareable Link (copies the URL to your clipboard).
- Click Save to complete the document
- Click Take Payment to complete the sale
Method 2: Agreement Prompt Disabled (Manual)
If the automatic prompt setting is disabled, staff can manually attach and present a membership agreement directly on the ticket.
- Navigate to POS > New Ticket
- Select or add the client, then add the membership to the ticket
- Click the Waiver dropdown menu on the ticket and select the desired agreement
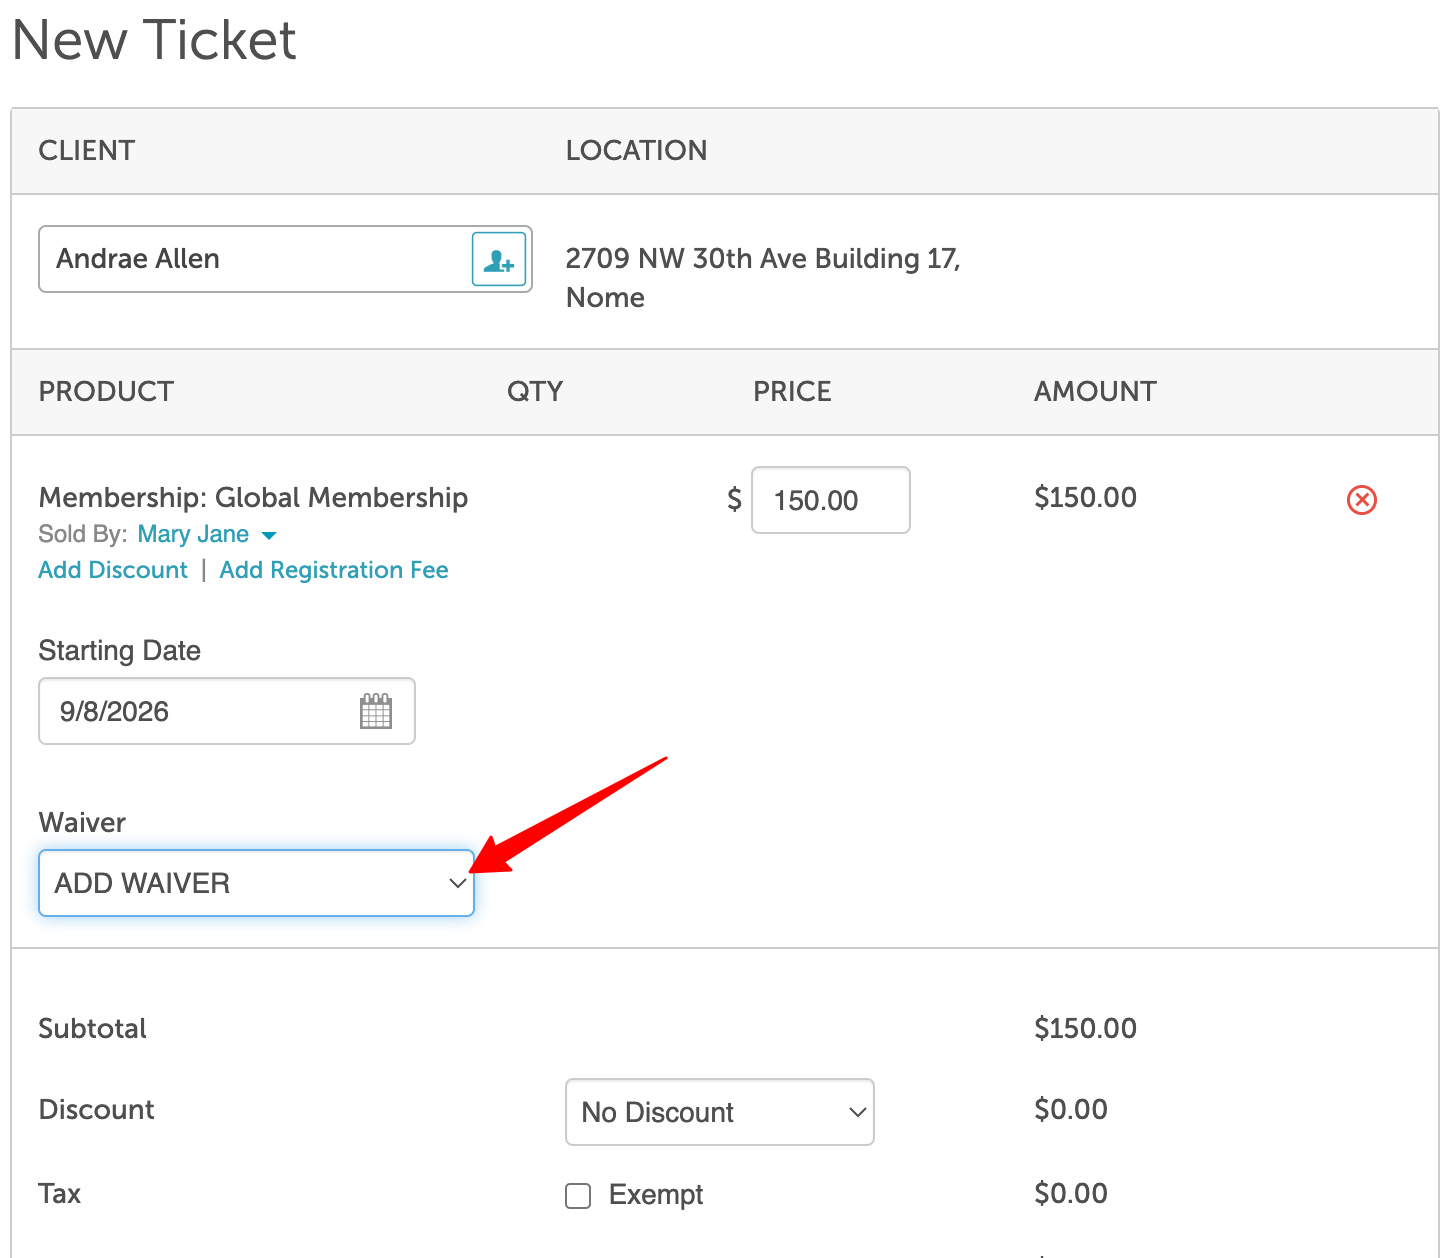
- Have the client sign the agreement modal that appears
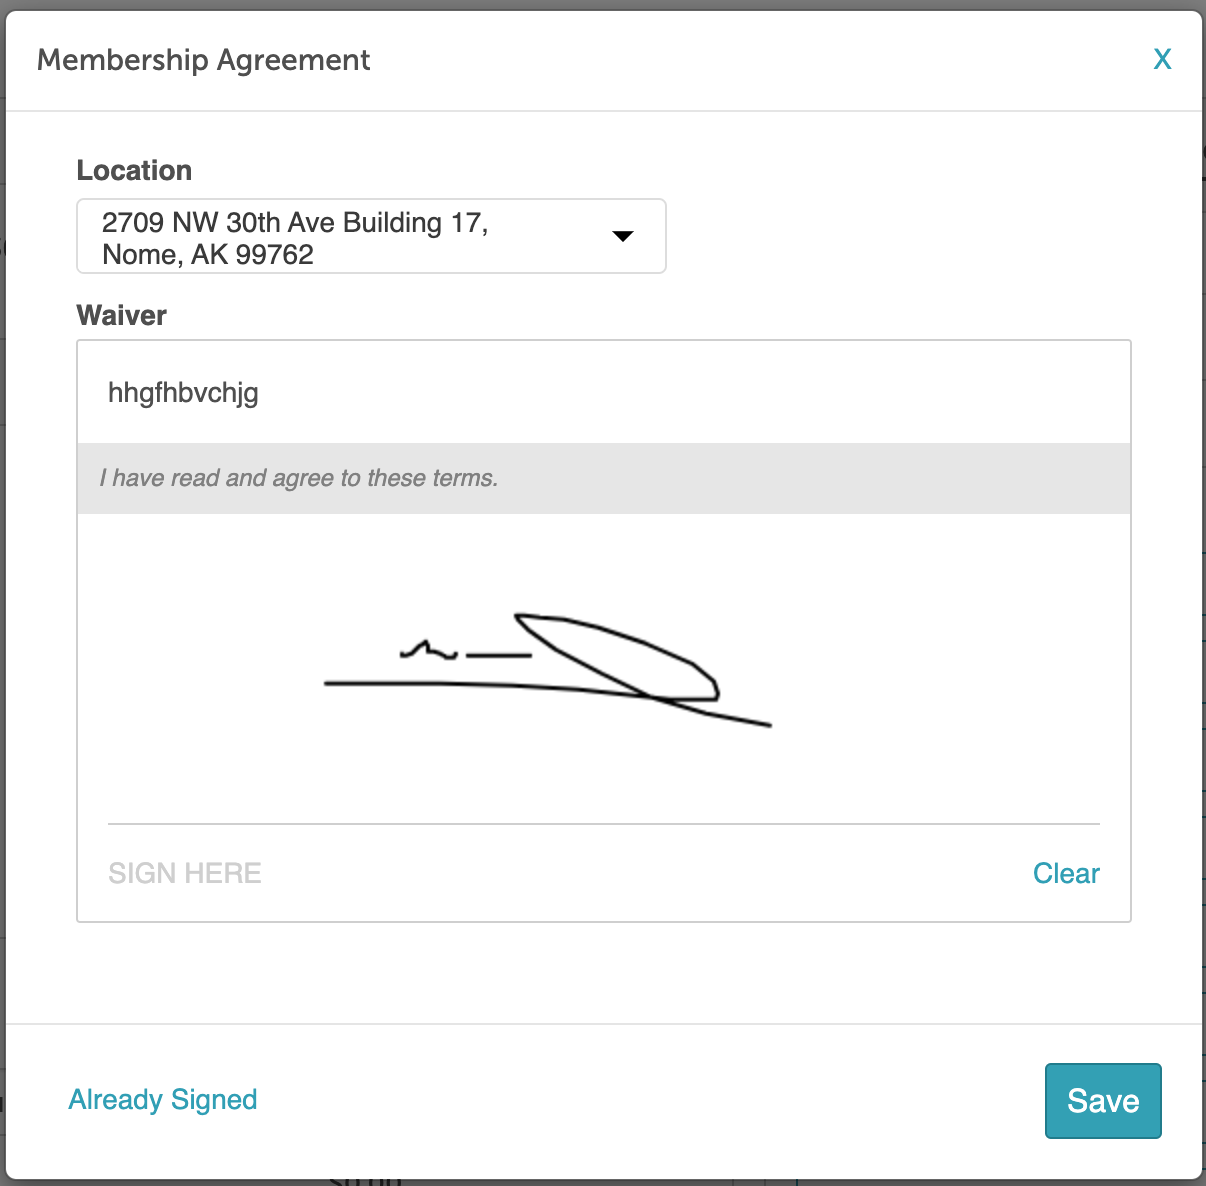
- Click Save to finalize the signed document
- Click Take Payment to complete sale
For more information, contact us at support@mytime.com or (385) 233-6964.
Related Articles:
Creating Waivers and Intake Forms
Was this article helpful?
That’s Great!
Thank you for your feedback
Sorry! We couldn't be helpful
Thank you for your feedback
Feedback sent
We appreciate your effort and will try to fix the article