Add-on services can be scheduled within multi-day appointments, allowing you to choose the exact dates (and times, if enabled) on which the add-ons should occur. This article explains how scheduled add-ons work.
Things to Know:
- The ability to schedule appointments is controlled by the 'Accessing Appointments' access control setting
- Scheduling add-ons within a multi-day service requires a hidden setting that can only be enabled by the MyTime team. To activate it, contact support@mytime.com
- By default, when a multi-day service is booked with a non-multi-day add-on, the entire appointment appears in the multi-day bar at the top of the scheduler. A hidden setting allows you to display the core service at the top and place the add-on in the appropriate time slot. Contact Support to enable it.
- To schedule add-ons independently, you must first unlock them from their core service in the appointment modal
- When an add-on is locked to a core service, its start time automatically follows the core service’s end time. Once unlocked, the add-on can be scheduled on any date within the multi-day service.
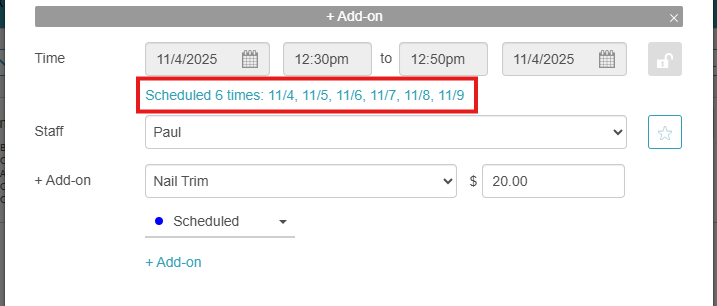
- Hovering over the scheduled add-on times hyperlink shows all selected dates for that add-on
- Changing the appointment end date updates the service multiplier and recalculates pricing
- For Redo, Book Again, and Recurring Appointments, add-ons must be added or updated manually
- Hovering over an appointment on the schedule displays a tooltip showing the core service and all add-ons, grouped by service name and duration
- For appointments created in-store, a ticket is created only when you click 'Create Ticket' or complete checkout through the POS
Contents
Scheduled Add-Ons – Single Start Time
To schedule add-ons within a multi-day service:
- Go to Schedule
- Filter by date, location, and staff
- Click New Appointment or select a time slot directly on the schedule

- In the appointment modal, add the client, pet/family member, and staff member

- Select the core multi-day service, then click the add-ons hyperlink to add an add-on

- Click the lock icon next to the add-on’s date and time to unlock it from the core service
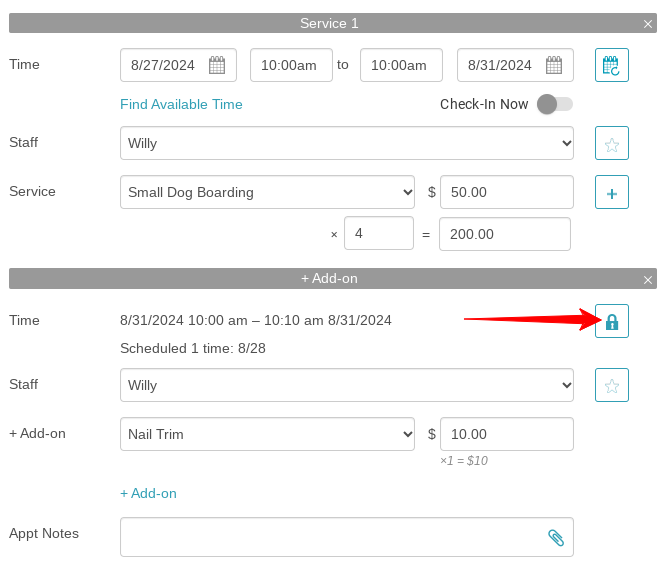
- Click the Scheduled 1 time hyperlink that appears

- In the Scheduled Add-On modal, choose the dates on which the add-on should occur
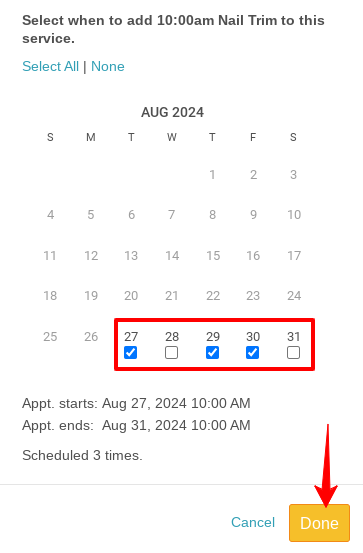
- Click Done to save your selections
- The add-on multiplier will update automatically based on the number of selected dates. Click Save in the appointment modal
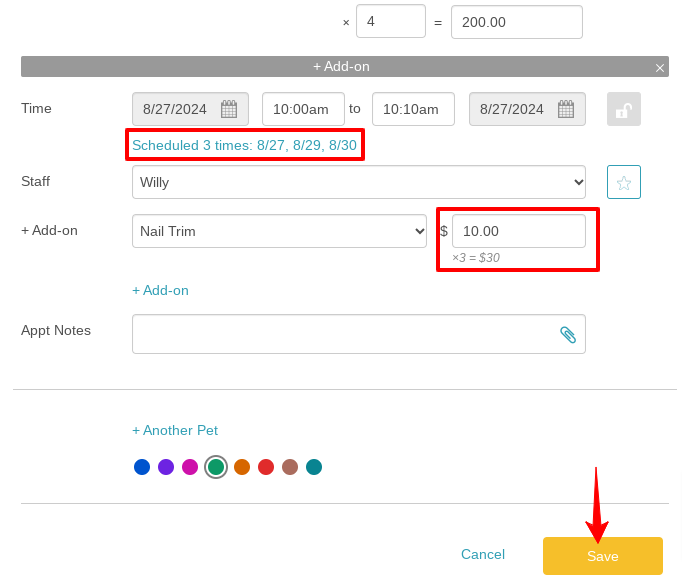
- Hovering over the appointment on the schedule will show the core service and grouped add-ons with their durations

Scheduled Add-Ons – Multiple Start Times
Things to Know:
- These enhanced features require the 'Enable Scheduled Add-ons v2' hidden setting to be enabled. Contact Support to enable it
- You can assign different start times for the add-on on different days. Example: If a core service runs from August 1–5, you can schedule the add-on for 2:00 PM on August 2, 10:00 AM on August 3, and 4:30 PM on August 5, all within the same multi-day appointment.
- Add-ons are grouped in the appointment view by service type and start time
- The "Select All" option chooses all eligible days and applies one start time to all
- You can assign a custom start time per day
- You can add multiple start times for the same date using "+ Add Another"
To schedule add-ons for multi-day services using multiple start times, simply:
- Go to Schedule and filter as needed
- Click New Appointment or select a time slot
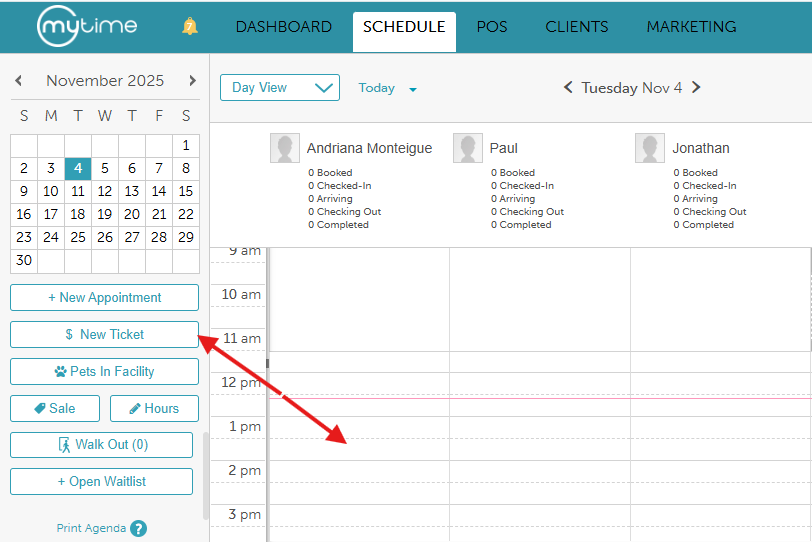
- Add the client, pet/family member, and staff member
- Select the core service and then the add-on

- Unlock the add-on using the lock icon

- Click the Scheduled 1 time hyperlink

- In the modal:
- Select dates individually or click Select All

- Apply one start time or set different times per day
- Use + Add Another to create multiple start times for the same date
- Select dates individually or click Select All
- Click Done, then Save in the appointment modal

- The appointment modal will now show the add-on dates and their configurations
- Hovering over the appointment displays grouped add-ons by service name, start time, and duration
For more information, contact us at support@mytime.com
Related Articles:
Was this article helpful?
That’s Great!
Thank you for your feedback
Sorry! We couldn't be helpful
Thank you for your feedback
Feedback sent
We appreciate your effort and will try to fix the article