In this article, we will look at the meaning of each setting under the Calendar section on the Settings page.
Setting | Description |
Take Appointments | This setting determines whether your business takes appointments or walk-ins only. |
Schedule Classes / Events | This setting allows classes or events to be created and scheduled. Learn more here |
Multi-Staff Appointments | This setting allows different staff members to be assigned to each service within one appointment. Once enabled, it cannot be disabled. Learn more here |
Disconnect services by default | For accounts with the Multi-Staff Appointments setting enabled, when an appointment includes multiple services, if the services are disconnected, they can be moved independently from each other. Learn more here |
Sort Class Session Roster by Attendee Name | When enabled, the class roster will display attendees alphabetically by first name. |
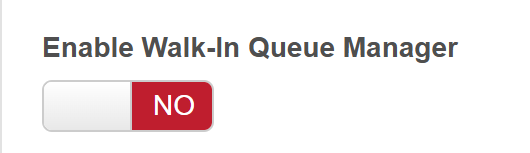
Enable Walk-In Queue Manager | The walk-in queue is a feature that allows you to keep a list of clients who are waiting for the next available appointment. When enabled, the walk-in queue is visible on the left-hand side of the schedule. Learn more here |
Make waitlist same-day only? | When enabled, the system will look at the working hours to determine both the next available employee and the estimated wait time. If there aren't any slots available for the rest of the day, it returns N/A for the estimated wait time. |
| Waitlist maximum | You can limit how long the walk-in queue can expand, i.e., if the wait time exceeds x hours, clients cannot be added to the list. The minimum and maximum values allowed are 0.5 hours (30 minutes) and 24 hours, respectively. Learn more here |
Display waitlist appointments on Day View? | Any client that is added to the walk-in queue will be shown as a striped block on the selected staff member’s schedule for the next available appointment slot. This will minimize the possibility of accidentally scheduling new appointments in front of clients who are waiting. Learn more here |
Enable Split View | Split view displays your walk-in queue on the same screen as a list of in-service appointments so you can see the state of your store at a glance. This view is designed primarily for walk-in businesses. Learn more here |
Enable Appointment Waitlist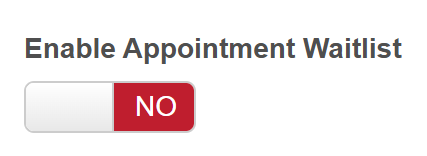 | This setting enables the ability to add clients to the appointment waitlist feature for both in-store and online bookings. Learn more here Note: This setting is only exposed if the 'Enable Client Waitlisting' hidden setting is enabled. |
Enable Classes Waitlist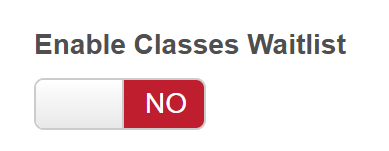 | This setting enables the ability to add clients to the class waitlist feature for both in-store and online bookings. Learn more here Note: This setting is only exposed if the 'Enable Client Waitlisting' hidden setting is enabled. |
Color Code Appointments Automatically | Appointments can be color-coded in three different ways: by appointment status, by staff member, or by service variation. Learn more here. |
Change Status to Completed: | You can choose how appointment statuses are marked as Completed in your system. This setting determines when an appointment is considered finished on the schedule. Available Options:
|
Automatically Check-Out already Checked-In appointments when ticket is closed | When this setting is enabled, the system will automatically mark appointments as checked out if they were previously marked as checked in once the associated ticket is closed. This helps ensure appointment statuses remain accurate without requiring manual updates. |
Do Not Update Duration When Completing Appointments Via Appointment Modal | If this setting is enabled, the appointment end time will NOT be updated when the appointment is completed automatically or manually |
Display appointment count in Calendar:  | Enabling this setting allows you to track the number of appointments and available booking slots for each staff member directly on the calendar.
|
Enable Filtering Appointments that are being checked in or checked out today  | This setting allows you to filter appointments in the Day and Agenda views to show only those that are being checked in and/or checked out on the current day. This is especially useful for businesses that manage multi-day appointments, as it helps staff easily identify which clients are arriving or departing today. Learn more here. |
Enable Service Multiplier Settings | Enable Service Multiplier Settings - This setting enables total price calculation for multi-day appointments based on duration and service price multipliers. Appointment Duration Multiplier - Automatically calculates the total cost for each service and add-on by multiplying the base price by the number of nights in the appointment. Instead of adding the same service multiple times, you can schedule it once and use this feature to determine cost by duration. Learn more here. Service Price Multiplier - Allows you to book services in units, then multiplies the unit count by the base service price to determine the total cost. The multiplier is set directly in the appointment modal. Learn more here. |
Update duration when appointment is auto completed | This setting is only visible when the "Change Status to Completed" setting is set to "Automatically, when the ticket is closed." When enabled, it will automatically update the appointment duration whenever the associated ticket is closed and the appointment status is updated to completed.
|
Allow "Client Quick-Add" | Quick Add allows you to create a client from the new appointment modal with just client's name, email, and phone number. |
Require Mandatory Client Fields To Be Completed Before Checkout | When this setting is enabled, all required client fields must be filled out before the ticket can be printed, and the appointment can be checked out. Learn more here. |
Permit Walk-ins Without Client Records | Allows booking appointments for walk-ins without specifying a client. |
Allow Redo Appointments
| Redo Appointments are services performed at no charge to the client. Once enabled, the redo button will only appear on completed appointments. Learn more here |
Should Original Staff Member Receive Service Commissions On Redos? | If disabled, when a redo is done the commission for the original service will be deducted. So if John has an appointment with 3 services from which 1 service was redone by Mary, John will get commission only for the 2 services and Mary will get a commission for the redo service. If enabled when a redo is done, the revenue and commission for the original service will not be affected. For instance, if John has an appointment with 3 services from which 1 service was redone by Mary, John will get commission for all 3 services for the original appointment and Mary will get commission for the redone service. |
Authorized IPs (comma separated) | This setting is exposed once the "Allow editing Authorized IPs" hidden setting is enabled. You can enter the static IP addresses (A static IP address is an IP address that does not change. It is permanently assigned to a device, network, or location) here, separating each one with a comma. For example, if you let your staff sign in only from the salon or office, you would enter your location's static IP address so the system recognizes and allows access. |
Authorized Fully Qualified Domain Names or FQDNs (comma separated)  | This setting is exposed once the "Allow editing Authorized IPs" hidden setting is enabled. You can enter domain names separated by commas, which is useful if your network uses dynamic (changing) IP addresses instead of static ones. Using domain names allows you to restrict access to MyTime without requiring a fixed IP. If you need a dynamic DNS service to create a domain name that updates automatically with your changing IP, you can use: https://my.noip.com/dynamic-dns |
Store Client Credit Cards? | Storing Client's Credit Card on the Booking Widget - Learn more here
Storing Client's Credit Card In-Store - Learn more here |
Require a description when booking a class | If enabled, a class cannot be scheduled without a description. |
Enable Attendee Resources for Classes | You can enable the “Enable Attendee Resources for Classes” setting to limit class capacity based on the resources assigned to each attendee type. Attendee resources refer to specific equipment or space allocated to different attendee groups, such as "General" and "VIP" types. For each time slot, the system determines availability by using the lower of the attendee limit or the resource limit. The combined total slots available for the class is the sum of these individual limits across all attendee types. Example:
|
Show Appointment Start Button | When this setting is enabled, a “Start Service” button will appear on the appointment modal.
However, if you use both the 'Update duration when appointment is auto completed' setting along with the start button, appointments will be updated based on when the start button is clicked.
|
Prerequisite Services  | This setting allows you to require clients to complete specific services before they can book another service. Use this to enforce service sequences (e.g., an initial consultation before a procedure). For franchise businesses, when a prerequisite service is set at the parent level for a global service, it applies to all child locations and cannot be changed by those locations. Learn more here. |
Enable Employee Appointment Intake Forms  | This setting allows you to configure employee intake forms on appointment modals to be completed by your staff members. Learn more here. |
Employee intake form label  | This setting allows you to customize the name of the employee intake form. |
Show Previous Values On Employee Intake Forms  | When enabled, this setting automatically pre-fills employee intake forms with values entered during the client’s previous appointment. This saves time and ensures consistency across visits. Learn more here. |
Enable Icon Custom Field  | This setting allows you to activate the "Icon" field type when creating custom fields, enabling you to visually represent field values using icons. Learn more here |
Enable Appointment Service Status | When enabled, this setting allows you to track the progress of individual services within a multi-service appointment. You’ll be able to see which services have been completed and which are still pending. Learn more here. |
Show Appointments in Agenda View Sorted by Start Date/Time | This setting allows appointments to be sorted by their start date and time. In cases where multiple appointments start simultaneously, they are then sorted by their end date and time, prioritizing those that end earlier. If appointments still coincide in start and end times, further sorting is done alphabetically by customer first name, and for pet businesses, by pet name. |
Display Service Count on Appointment Tiles
| This setting enables appointments on the schedule to display a visit count, showing how many appointments a client has completed within each service category. Learn more here |
Force Large Calendar Row Heights in Day View  | When enabled, this setting increases the height of appointment tiles in the Day View, making them easier to read. This setting is disabled by default. When disabled, the schedule cells are more compact, which can make appointment tiles appear crowded—especially when multiple appointments are booked close together. As a result, it may be harder to quickly view client names or service details. |


Related Articles:
- Creating Classes/Events
- Scheduling Multi-Staff Appointments
- Moving Multi-Staff Services/Appointments Independently
- Enabling Waitlist
- Waitlist Maximum Wait Time
- Waitlist Appointments in Day View
- Appointments in Split View
- Color Coding Appointments
- Appointment Count & Resource Capacity
- Filtering Appointments Being Checked In / Out
- Appointment Duration Multiplier
- Service Price Multiplier
- Redo Appointments
- Storing Client Credit Card Online
- Storing Clients Credit Card In-Store
- Start Service Button on Appointment Modal
- Prerequisite Services
- Creating Employee Intake Form (SOAP Notes)
- Custom Client Icons
- Appointment Service Status
- Appointment Visits on Appointment Tiles
Was this article helpful?
That’s Great!
Thank you for your feedback
Sorry! We couldn't be helpful
Thank you for your feedback
Feedback sent
We appreciate your effort and will try to fix the article